
| 일 | 월 | 화 | 수 | 목 | 금 | 토 |
|---|---|---|---|---|---|---|
| 1 | 2 | 3 | ||||
| 4 | 5 | 6 | 7 | 8 | 9 | 10 |
| 11 | 12 | 13 | 14 | 15 | 16 | 17 |
| 18 | 19 | 20 | 21 | 22 | 23 | 24 |
| 25 | 26 | 27 | 28 | 29 | 30 | 31 |
Tags
- API
- db데이터찾기
- 오창
- 내돈내산
- github
- openapi
- pycharm
- 이클립스 폰트
- 이클립스 글씨체
- 오창식당
- 스파르타코딩클럽
- 오창맛집
- 안드로이드개발자모드
- 개발
- 오창 식당
- 오창 돈까스
- 이클립스
- 이클립스 테마
- 코딩
- ajax
- 파이참
- 맥북단축키
- git hub
- 중국노래
- 아이폰
- json
- mongodb
- eclipse
- 맥북
- 개발자옵션
Archives
- Today
- Total
나의 기록_나의 다이어리
[스파르타코딩클럽: 웹개발 종합반] 1주차 정리 (HTML, CSS 실습, 부트스트랩, 예쁜 CSS 모음집) 본문
코딩/국비지원 개발인강 (스파르타코딩클럽)
[스파르타코딩클럽: 웹개발 종합반] 1주차 정리 (HTML, CSS 실습, 부트스트랩, 예쁜 CSS 모음집)
NayDiary 2022. 11. 5. 23:49반응형
SMALL
1. HTML, CSS
- HTML은 뼈대, CSS는 꾸미기!
- CSS를 잘 사용할 줄 아는 것과, '예쁘게' 만드는 것은 다른 영역이기 때문에(붓을 잡을 줄 아는 것과 그림을 잘 그릴 줄 아는 것의 차이), 많은 경우 웹디자이너나 퍼블리셔에게 의존하게 된다.
- HTML 크게 head와 body로 구성
- head안에는 페이지의 속성 정보를, body안에는 페이지의 내용을 담습니다.
- head 안에 들어가는 대표적인 요소들: meta, script, link, title 등
- 페이지의 속성을 정의하거나, 필요한 스크립트들을 부른다. 즉, 눈에 안 보이는 필요한 것들을 담는 것.
- body 안에 들어가는 대표적인 요소들!
<!DOCTYPE html>
<html lang="en">

<head>
    <meta charset="UTF-8">
    <meta name="viewport" content="width=device-width, initial-scale=1.0">
    <title>스파르타코딩클럽 | HTML 기초</title>
</head>

<body>
    <!-- 구역을 나누는 태그들 -->
    <div>나는 구역을 나누죠</div>
    <p>나는 문단이에요</p>
    <ul>
        <li> bullet point!1 </li>
        <li> bullet point!2 </li>
    </ul>

    <!-- 구역 내 콘텐츠 태그들 -->
    <h1>h1은 제목을 나타내는 태그입니다. 페이지마다 하나씩 꼭 써주는 게 좋아요. 그래야 구글 검색이 잘 되거든요.</h1>
    <h2>h2는 소제목입니다.</h2>
    <h3>h3~h6도 각자의 역할이 있죠. 비중은 작지만..</h3>
    <hr>
    span 태그입니다: 특정 <span style="color:red">글자</span>를 꾸밀 때 써요
    <hr>
    a 태그입니다: <a href="http://naver.com/"> 하이퍼링크 </a>
    <hr>
    img 태그입니다: <img src="https://www.google.com/images/branding/googlelogo/1x/googlelogo_color_272x92dp.png" />
    <hr>
    input 태그입니다: <input type="text" />
    <hr>
    button 태그입니다: <button> 버튼입니다</button>
    <hr>
    textarea 태그입니다: <textarea>나는 무엇일까요?</textarea>
</body>

</html>
2. 로그인 페이지 만들어보기
- 예제
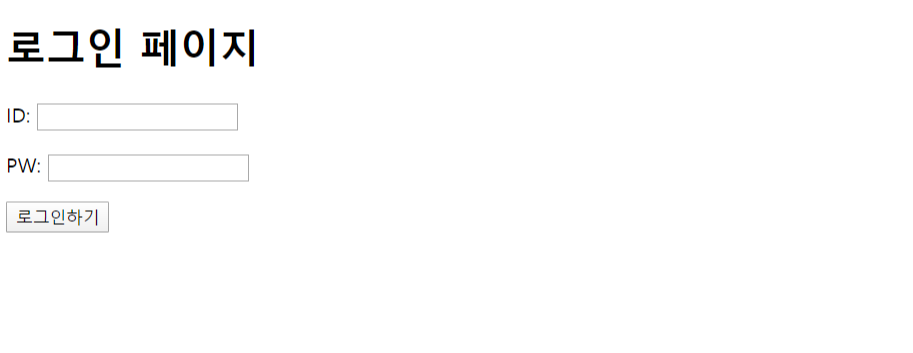
- 코드
<!DOCTYPE html>
<html lang="en">
<head>
    <meta charset="UTF-8">
    <title>로그인페이지</title>
</head>
<body>
    <h1>로그인 페이지</h1>
    <p>ID: <input type="text"/></p>
    <p>PW: <input type="text"/></p>
    <button>로그인하기</button>
</body>
</html>
3. CSS 기초
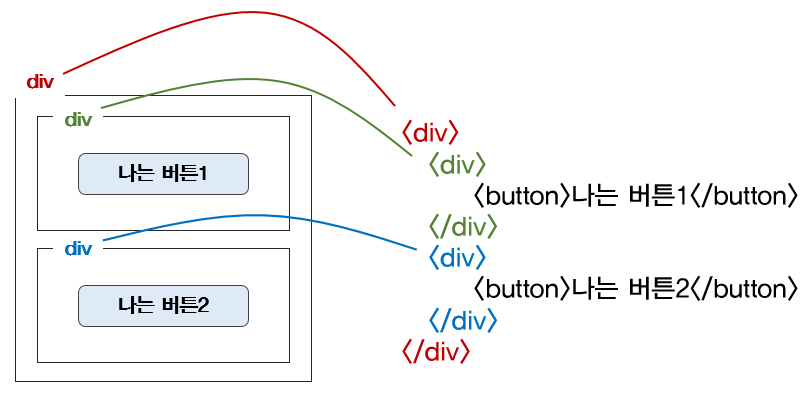
- HTML 부모-자식 구조 살펴보기
- 👉 html 태그는, "누가 누구 안에 있느냐"를 이해하는 것이 가장 중요. 나를 감싸고 있는 태그가 바뀌면, 그 안의 내용물도 모두 영향을 받는다.
- 빨간색 div 안에, 초록색/파란색 div가 들어있습니다. 아래와 같은 상황에서 빨간색 div를 가운데로 옮기면, 내용물인 초록/파란 div도 모두 함께 이동하겠죠!
- 즉, 박스를 옮기면 안의 내용물도 함께 옮겨지는 것과 같은 원리입니다.
- 같은 원리로, 초록 div의 글씨색을 바꾸면, 나는버튼1의 글씨색도 바뀐답니다!
- 👉 html 태그는, "누가 누구 안에 있느냐"를 이해하는 것이 가장 중요. 나를 감싸고 있는 태그가 바뀌면, 그 안의 내용물도 모두 영향을 받는다.
2. CSS 기초
- CSS는 어떻게 사용?
- <head> ~ </head> 안에 <style> ~ </style> 공간을 만들어 작성한다.
- mytitle라는 클래스를 가리킬 때, .mytitle { ... } 라고 써줘야 하는 것을 꼭! 기억!
- 자주 쓰는 CSS
- 배경관련
- background-color (네모박스 배경색)
- background-image (네모박스 이미지 - 보통 url 주소를 같이 기입)
- background-size
- 사이즈
- width (넓이)
- height (높이)
- 폰트
- font-size
- font-weight
- font-family
- color
- 간격
- margin (네모 박스 바깥 여백)
- padding (네모 박스 안쪽 여백)
- 배경관련
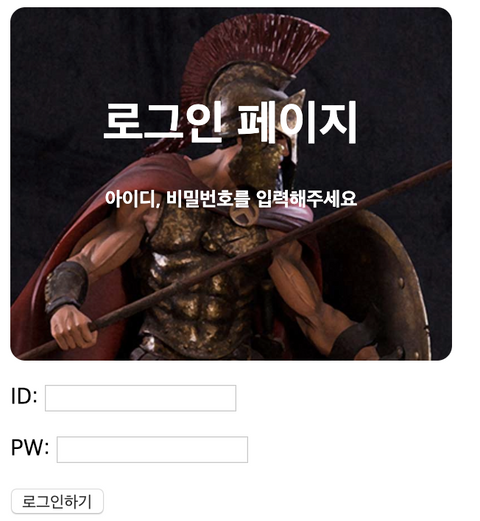
4. CSS 실습 1
<!DOCTYPE html>
<html lang="en">
<head>
<meta charset="UTF-8">
<meta name="viewport" content="width=device-width, initial-scale=1.0">
<title>스파르타코딩클럽 | 로그인페이지</title>
<style>
.mytitle {
color: white;
width: 300px;
height: 200px;
background-image: url('https://www.ancient-origins.net/sites/default/files/field/image/Agesilaus-II-cover.jpg');
background-position: center;
background-size: cover;
border-radius: 10px;
text-align: center;
padding-top: 40px;
}
</style>
</head>
<body>
<div class="mytitle">
<h1>로그인 페이지</h1>
<h5>아이디, 비밀번호를 입력해주세요</h5>
</div>
<div>
<p>
ID: <input type="text" />
</p>
<p>
PW: <input type="password" />
</p>
</div>
<button>로그인하기</button>
</body>
</body>
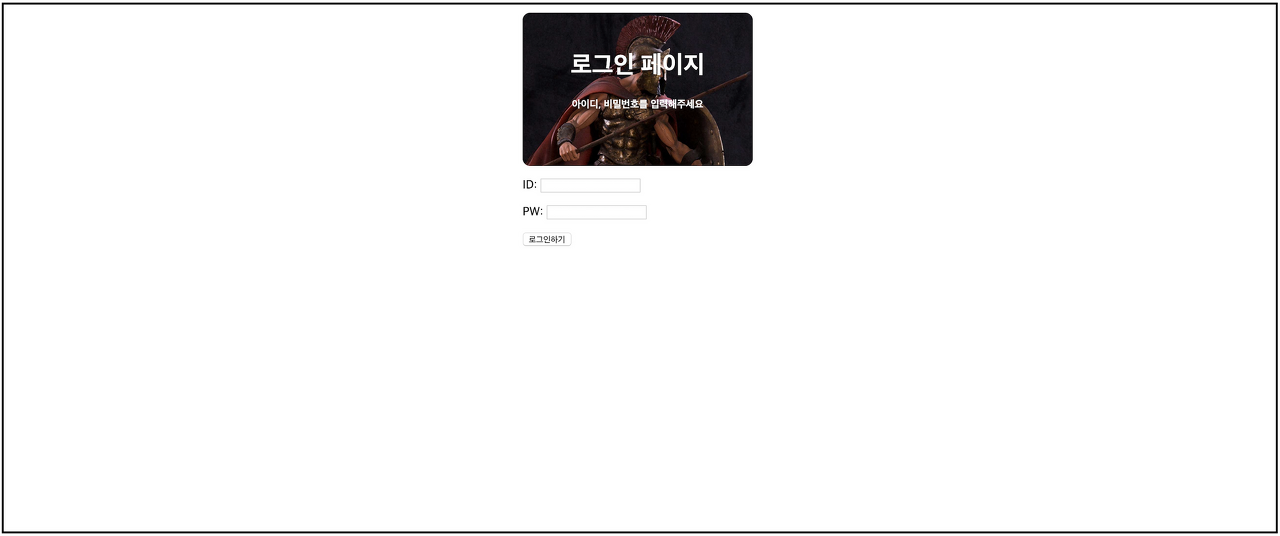
</html>5. CSS 실습 1-1
- 만들어둔 로그인 화면을 가운데로 가져오려면?
- width를 주고, margin: auto를 사용하자!
- 그래도 안되면? display:block을 추가!
<!DOCTYPE html>
<html lang="en">

<head>
    <meta charset="UTF-8">
    <meta name="viewport" content="width=device-width, initial-scale=1.0">
    <title>스파르타코딩클럽 | 로그인페이지</title>
    <style>
        .mytitle {
            color: white;
            width: 300px;
            height: 200px;
            background-image: url('https://www.ancient-origins.net/sites/default/files/field/image/Agesilaus-II-cover.jpg');
            background-position: center;
            background-size: cover;

            border-radius: 10px;
            text-align: center;
            padding-top: 40px;
        }

        .wrap {
            margin: 10px auto;
            width: 300px;
        }
    </style>
</head>

<body>
    <div class="wrap">
        <div class="mytitle">
            <h1>로그인 페이지</h1>
            <h5>아이디, 비밀번호를 입력해주세요</h5>
        </div>
        <div>
            <p>
                ID: <input type="text" />
            </p>
            <p>
                PW: <input type="password" />
            </p>
        </div>
        <button>로그인하기</button>
    </div>
</body>
</body>

</html>
6. 폰트, 주석, 파일분리
- 구글 웹폰트 입히기
- 구글 웹폰트 (1) 마음에 드는 폰트를 클릭
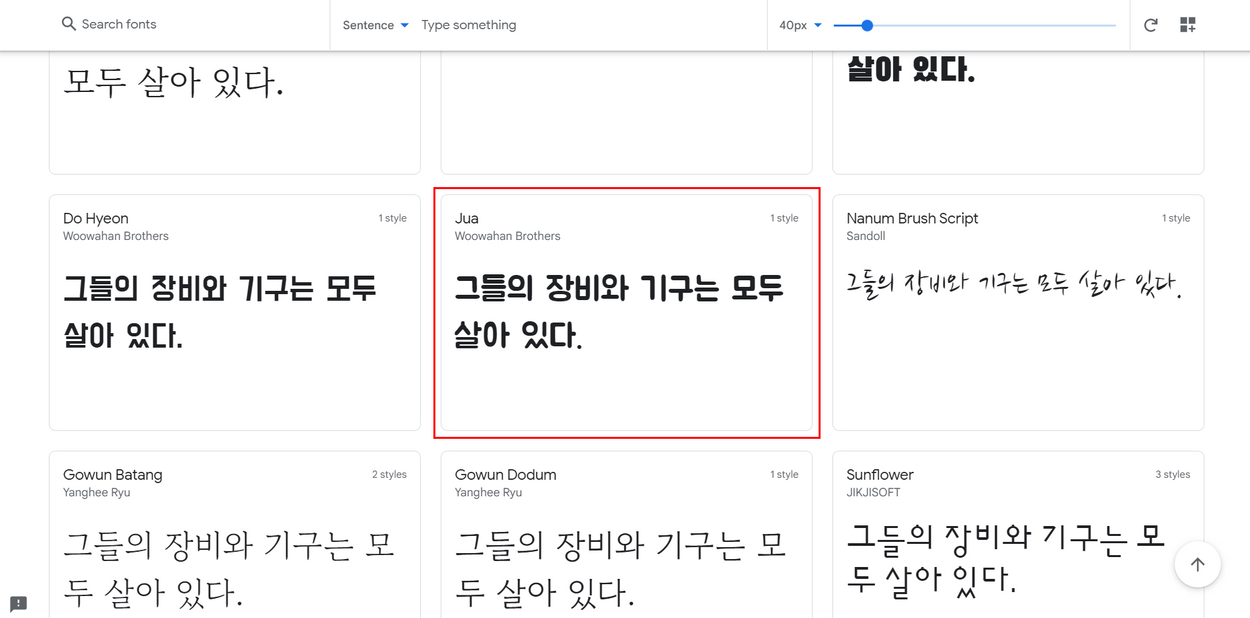
(2) [ + Select this style ]을 클릭

(3) 우측 상단의 모음 아이콘을 클릭

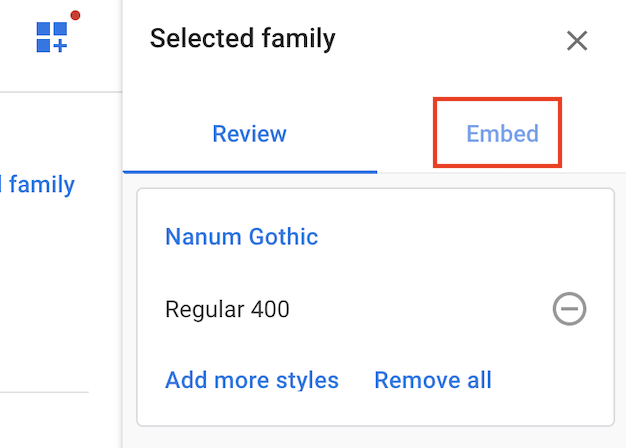
(5) link 태그 복사👉 <head> ~ </head>사이에, CSS 복사👉<style> ~ </style> 사이에 넣기

- Jua라는 폰트를 예제로 추가해보면, 아래와 같은 코드를 복사하면 됩니다.
<!-- HTML에 이 부분을 추가하고 -->
<link href="https://fonts.googleapis.com/css2?family=Jua&display=swap" rel="stylesheet">
/* CSS에 이 부분을 추가하면 완성! */
* {
font-family: 'Jua', sans-serif;
}👉 <style> ~ </style> 부분이 너무 길어지면, css 파일을 분리하고 불러오는 것이 편함
<!-- style.css 파일을 같은 폴더에 만들고, head 태그에서 불러오기 -->
<link rel="stylesheet" type="text/css" href = "(css파일이름).css">
7. 부트스트랩, 예쁜 CSS 모음집
- bootstrap이란?
- 부트스트랩이란? 예쁜 CSS를 미리 모아둔 것 (CSS를 다룰 줄 아는 것과, 미적 감각을 발휘하여 예쁘게 만드는 것은 다른 이야기이기 때문에, 현업에서는 미리 완성된 부트스트랩을 가져다 쓰는 경우가 많습니다.)
- bootstrap - 시작 템플릿
- 남이 미리 작성한 CSS를 내 HTML 파일에 적용한다는 점에서, bootstrap 적용은 CSS 파일 분리와 원리가 동일. 다만, CSS의 파일이 인터넷 어딘가에 있다는 점이 다를 뿐.
- 부트스트랩 컴포넌트 5.0 사이트: https://getbootstrap.com/docs/5.0/components/buttons/
/*기본 템플릿*/

<!doctype html>
<html lang="en">

<head>
    <meta charset="utf-8">
    <meta name="viewport" content="width=device-width, initial-scale=1, shrink-to-fit=no">

    <link href="https://cdn.jsdelivr.net/npm/bootstrap@5.0.2/dist/css/bootstrap.min.css" rel="stylesheet"
        integrity="sha384-EVSTQN3/azprG1Anm3QDgpJLIm9Nao0Yz1ztcQTwFspd3yD65VohhpuuCOmLASjC" crossorigin="anonymous">
    <script src="https://ajax.googleapis.com/ajax/libs/jquery/3.5.1/jquery.min.js"></script>
    <script src="https://cdn.jsdelivr.net/npm/bootstrap@5.0.2/dist/js/bootstrap.bundle.min.js"
        integrity="sha384-MrcW6ZMFYlzcLA8Nl+NtUVF0sA7MsXsP1UyJoMp4YLEuNSfAP+JcXn/tWtIaxVXM"
        crossorigin="anonymous"></script>

    <title>스파르타코딩클럽 | 부트스트랩 연습하기</title>
</head>

<body>
    <h1>이걸로 시작해보죠!</h1>
</body>

</html>
9. CSS 실습 2

<!doctype html>
<html lang="en">

<head>
    <meta charset="utf-8">
    <meta name="viewport" content="width=device-width, initial-scale=1, shrink-to-fit=no">

    <link href="https://cdn.jsdelivr.net/npm/bootstrap@5.0.2/dist/css/bootstrap.min.css" rel="stylesheet"
        integrity="sha384-EVSTQN3/azprG1Anm3QDgpJLIm9Nao0Yz1ztcQTwFspd3yD65VohhpuuCOmLASjC" crossorigin="anonymous">
    <script src="https://ajax.googleapis.com/ajax/libs/jquery/3.5.1/jquery.min.js"></script>
    <script src="https://cdn.jsdelivr.net/npm/bootstrap@5.0.2/dist/js/bootstrap.bundle.min.js"
        integrity="sha384-MrcW6ZMFYlzcLA8Nl+NtUVF0sA7MsXsP1UyJoMp4YLEuNSfAP+JcXn/tWtIaxVXM"
        crossorigin="anonymous"></script>

    <title>스파르타 피디아</title>

    <style>
        .mytitle {
            width: 100%;
            height: 250px;

            background-image: linear-gradient(0deg, rgba(0, 0, 0, 0.5), rgba(0, 0, 0, 0.5)), url('https://movie-phinf.pstatic.net/20210715_95/1626338192428gTnJl_JPEG/movie_image.jpg');
            background-position: center;
            background-size: cover;

            color: white;

            display: flex;
            flex-direction: column;
            align-items: center;
            justify-content: center;
        }
        .mytitle > button {
            width: 200px;
            height: 50px;

            background-color: transparent;
            color: white;

            border-radius: 50px;
            border: 1px solid white;

            margin-top: 10px;
        }

        .mytitle > button:hover {
            border: 2px solid white;
        }
    </style>
</head>

<body>
    <div class="mytitle">
        <h1>내 생애 최고의 영화들</h1>
        <button>영화 기록하기</button>
    </div>
</body>

</html>- 구글폰트 link
<link href="https://fonts.googleapis.com/css2?family=Gowun+Dodum&display=swap" rel="stylesheet">- 구글폰트 css
* {
    font-family: 'Gowun Dodum', sans-serif;
}- 이미지 어둡게 하기
linear-gradient(0deg, rgba(0, 0, 0, 0.5), rgba(0, 0, 0, 0.5))10. CSS 실습 2-1 (부트스트랩 써보기)

- 카드 복사해서 붙여넣기
- Card 카테고리에서 여러개 있는 Card 를 클릭!
- 이미지 넣고, 개수 조절하기
- row-cols-md-3 → row-cols-md-4 로 바꾸기
- 포스터이미지
https://movie-phinf.pstatic.net/20210728_221/1627440327667GyoYj_JPEG/movie_image.jpg3. 별 넣고, 코멘트 달기
- <p> 태그를 활용합니다. 코멘트는 class를 줘서 회색 글씨로!
- 꿀팁 - 이모티콘 모음: https://kr.piliapp.com/facebook-symbols/
페이스 북 기호 : 웃는 기호, 이모티콘 기호, 이모티콘과 코드 목록
× 이모지 - 이모티콘 혹은 웃는 얼굴이라고도 불립니다. iOS와 Android는 기본적으로 845개의 이모티콘을 지원하고 있으며, 페이스북은 하트/사랑 기호, 별, 부호 및 동물 모양을 포함한 절반을 지원
kr.piliapp.com
11. CSS 실습 2-2 (포스팅박스 완성하기!)
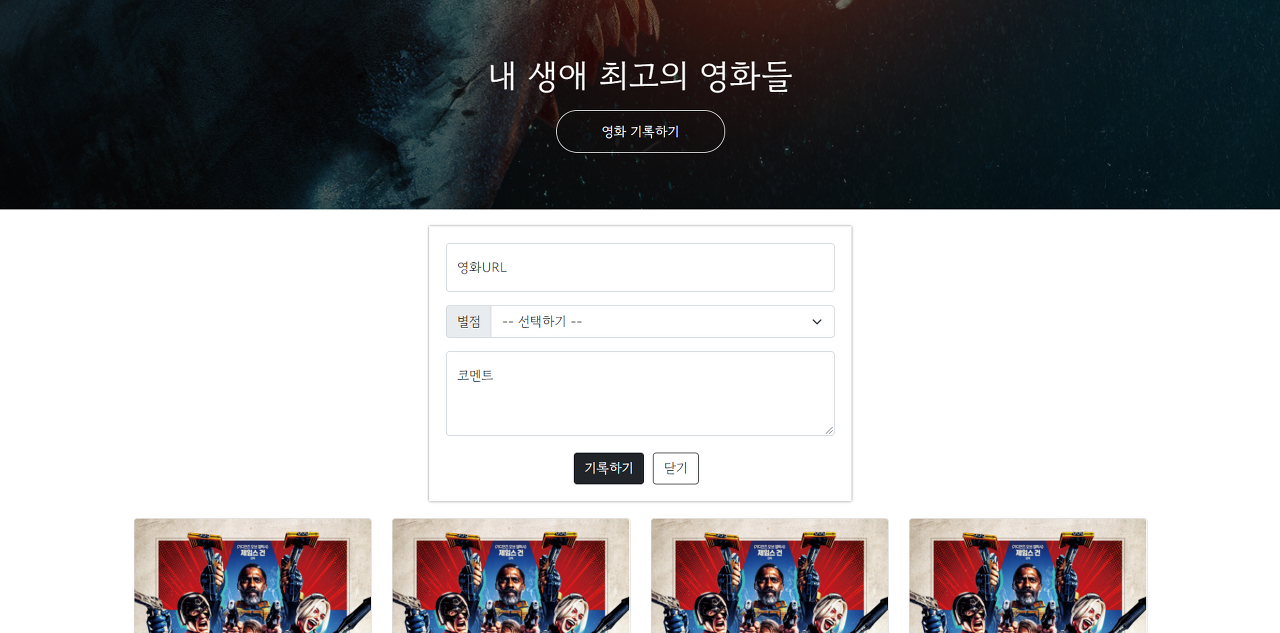
1) 포스팅 박스를 넣어보기
- 우선 큰 박스 먼저 만들기 (함께)→ 안쪽으로 띄우기: padding: 20px;
- → 그림자 효과: box-shadow: 0px 0px 3px 0px gray;
- 영화 URL
- → Forms 의 Floating Labels 참고
- 별점 박스
- → Input group의 Custom forms 참고
- 코멘트 URL
- → Forms 의 Floating Labels의 Textareas 참고
- 기록하기, 닫기 버튼→ Buttons 참고
- → Button 두 개를 묶을 div를 만들어 display:flex 주기 (네 줄!)
<!doctype html>
<html lang="en">

<head>
    <meta charset="utf-8">
    <meta name="viewport" content="width=device-width, initial-scale=1, shrink-to-fit=no">

    <link href="https://cdn.jsdelivr.net/npm/bootstrap@5.0.2/dist/css/bootstrap.min.css" rel="stylesheet"
          integrity="sha384-EVSTQN3/azprG1Anm3QDgpJLIm9Nao0Yz1ztcQTwFspd3yD65VohhpuuCOmLASjC" crossorigin="anonymous">
    <script src="https://ajax.googleapis.com/ajax/libs/jquery/3.5.1/jquery.min.js"></script>
    <script src="https://cdn.jsdelivr.net/npm/bootstrap@5.0.2/dist/js/bootstrap.bundle.min.js"
            integrity="sha384-MrcW6ZMFYlzcLA8Nl+NtUVF0sA7MsXsP1UyJoMp4YLEuNSfAP+JcXn/tWtIaxVXM"
            crossorigin="anonymous"></script>

    <title>스파르타 피디아</title>

    <link href="https://fonts.googleapis.com/css2?family=Gowun+Dodum&display=swap" rel="stylesheet">

    <style>
        * {
            font-family: 'Gowun Dodum', sans-serif;
        }

        .mytitle {
            width: 100%;
            height: 250px;

            background-image: linear-gradient(0deg, rgba(0, 0, 0, 0.5), rgba(0, 0, 0, 0.5)), url('https://movie-phinf.pstatic.net/20210715_95/1626338192428gTnJl_JPEG/movie_image.jpg');
            background-position: center;
            background-size: cover;

            color: white;

            display: flex;
            flex-direction: column;
            align-items: center;
            justify-content: center;
        }

        .mytitle > button {
            width: 200px;
            height: 50px;

            background-color: transparent;
            color: white;

            border-radius: 50px;
            border: 1px solid white;

            margin-top: 10px;
        }

        .mytitle > button:hover {
            border: 2px solid white;
        }

        .mycomment {
            color: gray;
        }

        .mycards {
            margin: 20px auto 0px auto;
            width: 95%;
            max-width: 1200px;
        }

        .mypost {
            width: 95%;
            max-width: 500px;
            margin: 20px auto 0px auto;
            padding: 20px;
            box-shadow: 0px 0px 3px 0px gray;
        }

        .mybtns {
            display: flex;
            flex-direction: row;
            align-items: center;
            justify-content: center;

            margin-top: 20px;
        }
        .mybtns > button {
            margin-right: 10px;
        }
    </style>
</head>

<body>
<div class="mytitle">
    <h1>내 생애 최고의 영화들</h1>
    <button>영화 기록하기</button>
</div>
<div class="mypost">
    <div class="form-floating mb-3">
        <input type="email" class="form-control" id="floatingInput" placeholder="name@example.com">
        <label for="floatingInput">영화URL</label>
    </div>
    <div class="input-group mb-3">
        <label class="input-group-text" for="inputGroupSelect01">별점</label>
        <select class="form-select" id="inputGroupSelect01">
            <option selected>-- 선택하기 --</option>
            <option value="1">⭐</option>
            <option value="2">⭐⭐</option>
            <option value="3">⭐⭐⭐</option>
            <option value="4">⭐⭐⭐⭐</option>
            <option value="5">⭐⭐⭐⭐⭐</option>
        </select>
    </div>
    <div class="form-floating">
        <textarea class="form-control" placeholder="Leave a comment here" id="floatingTextarea2"
                  style="height: 100px"></textarea>
        <label for="floatingTextarea2">코멘트</label>
    </div>
    <div class="mybtns">
        <button type="button" class="btn btn-dark">기록하기</button>
        <button type="button" class="btn btn-outline-dark">닫기</button>
    </div>
</div>
<div class="mycards">
    <div class="row row-cols-1 row-cols-md-4 g-4">
        <div class="col">
            <div class="card h-100">
                <img src="https://movie-phinf.pstatic.net/20210728_221/1627440327667GyoYj_JPEG/movie_image.jpg"
                     class="card-img-top" alt="...">
                <div class="card-body">
                    <h5 class="card-title">영화 제목이 들어갑니다</h5>
                    <p class="card-text">여기에 영화에 대한 설명이 들어갑니다.</p>
                    <p>⭐⭐⭐</p>
                    <p class="mycomment">나의 한줄 평을 씁니다</p>
                </div>
            </div>
        </div>
    </div>
</div>
</body>

</html>
2) 약간의 모바일 처리를 해두기 (모바일에서는 "가로 사이즈"가 가장 문제. 모바일 화면에도 맞출 수 있게 설정하기)
- 어디서나 500px 로 맞춰라 (width: 500px)
- 화면 폭 500px 전에는 95%로 맞추다가, 넘으면 최대 500px으로 보여줘 라고 설정하기
width: 95%;
max-width: 500px;
반응형
SMALL
반응형
LIST
'코딩 > 국비지원 개발인강 (스파르타코딩클럽)' 카테고리의 다른 글
| [스파르타코딩클럽: 웹개발종합반] 2주차 정리 (Ajax 실습1 - 서울시 미세먼지 OpenAPI 이용하여 실시간 미세먼지 표시) (0) | 2022.11.06 |
|---|---|
| [스파르타코딩클럽: 웹개발종합반] 2주차 정리 (Ajax 설명) (0) | 2022.11.06 |
| [스파르타코딩클럽: 웹개발종합반] 2주차 정리 (서버, 클라이언트, JSON, OpenAPI, Jsonview-JSON 예쁘게 보기) (0) | 2022.11.06 |
| [스파르타코딩클럽: 웹개발 종합반] 1주차 정리 (Javascript - 크롬 개발자도구, 리스트, 딕셔너리, 조건문, 반복문) (0) | 2022.11.05 |
| [스파르타코딩클럽: 웹개발 종합반] 1주차 정리 (서버 / 클라이언트 / 웹의 동작 개념) (0) | 2022.11.03 |
'코딩/국비지원 개발인강 (스파르타코딩클럽)' Related Articles
more


Comments